

Download uvScreenCamera – Free Screen Recorder & Video Tutorial Tool for Windows, Mac, Android, iOS
Introducing uvScreenCamera: The Ultimate Tool for Creating Screencasts and Tutorials
In today’s digital world, visual content reigns supreme. Whether you're a teacher explaining a concept, a software developer creating a demo, or a content creator sharing tips, the ability to record and share on-screen activity is essential. Enter uvScreenCamera—a lightweight, intuitive screen recording software designed to make screencasts and video tutorials effortless. With its user-friendly interface and powerful recording features, uvScreenCamera stands out as one of the best free tools for anyone who needs to capture their screen quickly and professionally. One of the biggest advantages of uvScreenCamera is its simplicity. Unlike complex video editing suites that require a steep learning curve, this software is built with beginners and casual users in mind. You can start recording in just a few clicks—no need to configure advanced settings or wrestle with timelines. The program supports full-screen, window-specific, or custom region recording, giving you full control over what gets captured. Whether you're demonstrating a new app, walking through a design process, or creating step-by-step guides, uvScreenCamera adapts to your workflow seamlessly. Another standout feature is its support for audio recording. You can capture system sound, microphone input, or both—ideal for narrated tutorials or live presentations. The ability to include cursor movements adds clarity and helps viewers follow along with your actions. Plus, the built-in basic editor allows you to enhance your recordings with annotations like arrows, notes, and shaded areas, making your content more engaging and informative. What truly sets uvScreenCamera apart is its versatility in export formats. You can save your videos as AVI, SWF, FLV, animated GIF, or even as a standalone EXE file—perfect for sharing without requiring viewers to install any additional software. This makes it ideal for educators, IT professionals, and remote teams who need to distribute content across different platforms and devices.Powerful Features That Make uvScreenCamera a Must-Have Tool
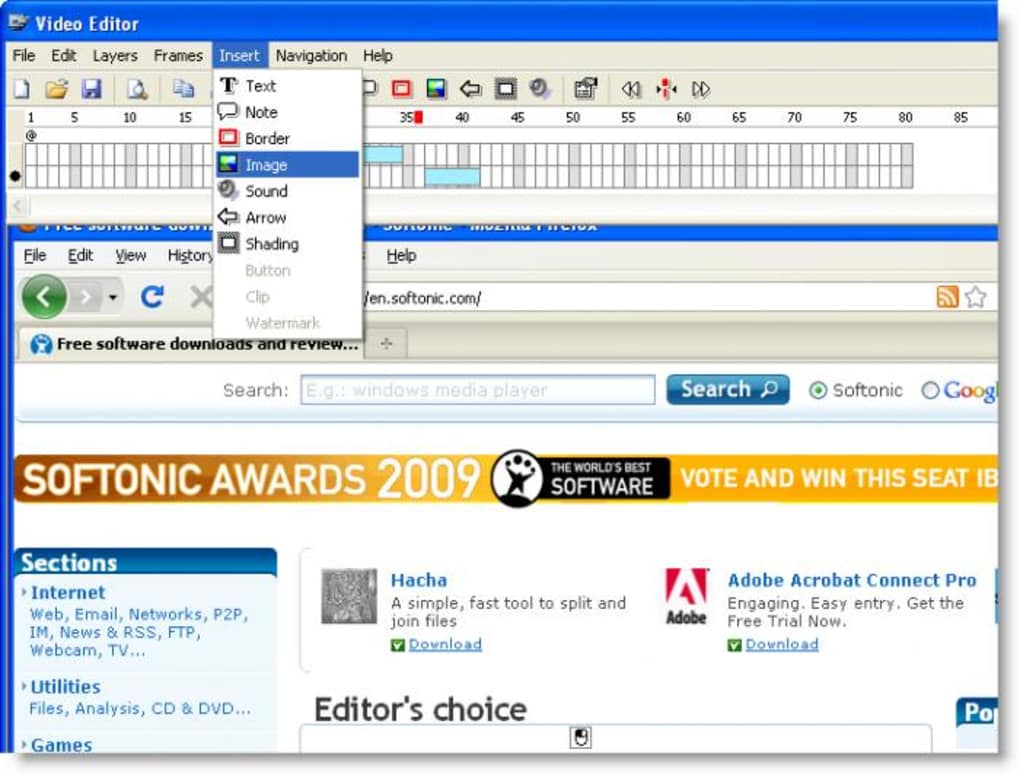
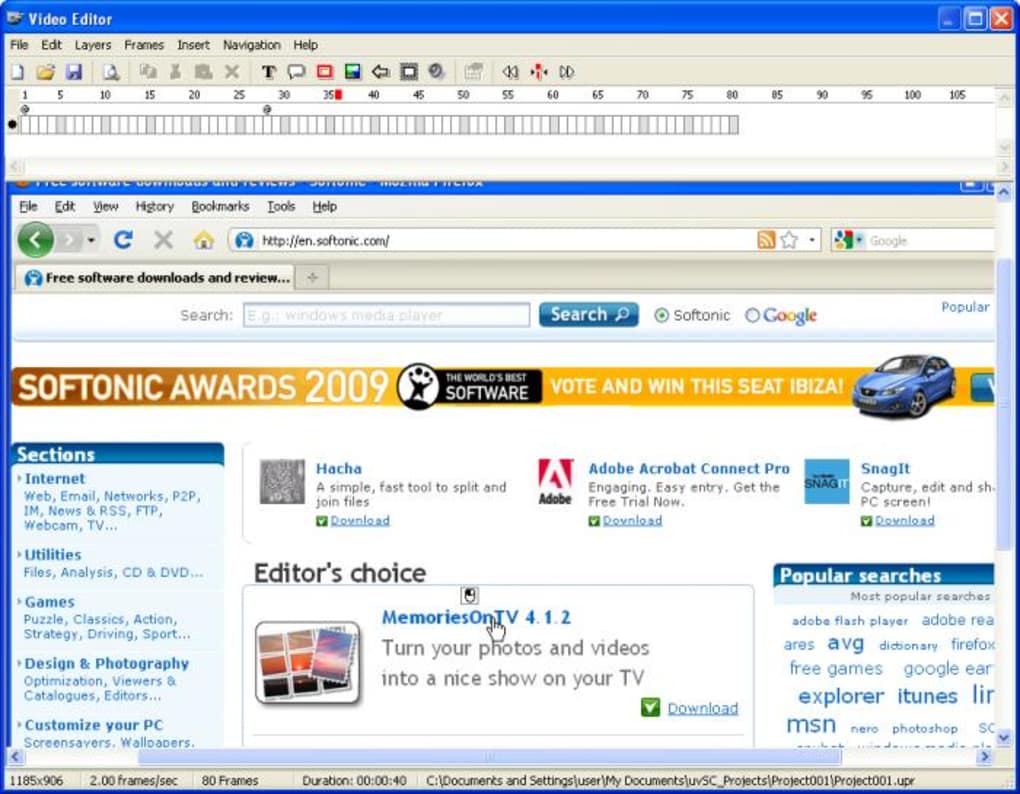
uvScreenCamera isn’t just about recording—it’s about creating high-quality, professional-grade content with minimal effort. The software comes packed with a range of features that cater to both casual users and professionals. One of the most appreciated features is the ability to record any portion of your screen with precision. Whether you want to focus on a specific window, a small section of your desktop, or the entire screen, the selection tool is intuitive and responsive. This flexibility ensures you can highlight exactly what matters, without distracting background content. Another key feature is the support for multiple audio sources. You can record system audio (like video playback or app sounds), microphone input (for narration), or both simultaneously. This is especially useful for educators creating lesson videos or developers showcasing app functionality with voice-over explanations. The audio sync is reliable, and the recording quality is crisp, making your content sound as professional as it looks. The built-in editor is a game-changer for quick enhancements. While it doesn’t offer a traditional timeline-based editing experience, it provides a suite of annotation tools that let you add static images, text notes, arrows, and shaded regions directly onto your video. These visual cues help guide viewers’ attention and improve comprehension—perfect for training materials or troubleshooting guides. For example, you can draw an arrow pointing to a specific button or highlight a menu item with a colored overlay. Export options are where uvScreenCamera truly shines. You can choose from AVI (ideal for editing), SWF and FLV (great for web embedding), animated GIF (perfect for social media snippets), or even a standalone EXE file. The EXE export is particularly useful for sharing tutorials with users who may not have media players installed. It’s self-contained and runs directly on any Windows machine. Additionally, the software is lightweight and doesn’t consume excessive system resources. This means you can record high-quality videos without slowing down your computer, even during long sessions. The interface is clean and clutter-free, ensuring you stay focused on your content, not the tool.How to Install and Use uvScreenCamera: A Step-by-Step Guide
Getting started with uvScreenCamera is straightforward, whether you're using Windows, Mac, Android, or iOS. The software is available for free download, and the installation process is quick and hassle-free. Once downloaded, simply run the installer and follow the on-screen prompts. No complicated setup or license key is required—just install and launch the app. Upon opening uvScreenCamera, you’ll be greeted with a minimalist interface. The main screen displays a preview of your selected recording area. To begin, click the “Record” button and choose your recording mode: full screen, active window, or custom region. You can adjust the recording area by dragging the selection box to precisely frame your content. This level of control ensures you capture only what you need. Next, configure your audio settings. You can enable system audio, microphone input, or both. Make sure your microphone is properly connected and tested before recording to avoid issues. You can also toggle cursor visibility—important for tutorials where mouse movements are central to the demonstration. Once everything is set, click “Start Recording.” The software will begin capturing your screen instantly, with a small countdown timer visible in the corner. During recording, you can pause or stop at any time. When finished, the recording is automatically saved to your chosen folder. To enhance your video, use the built-in editor. Click “Edit” to access annotation tools. Add arrows, notes, or shaded areas to highlight key points. While the editor lacks a timeline, it’s fast and responsive for quick fixes. Once satisfied, export your video in your preferred format. The export process is smooth and quick, with no long rendering times. For advanced users, uvScreenCamera also supports batch processing and scheduled recordings—ideal for automated demos or regular content updates. The software is regularly updated with performance improvements and new features, ensuring it stays secure and compatible with the latest operating systems.Compatibility, Pros, and Cons: Is uvScreenCamera Right for You?
uvScreenCamera is compatible with a wide range of devices and operating systems, including Windows 7 and later, macOS (Intel and Apple Silicon), Android (via compatible apps), and iOS (with specific configurations). This cross-platform support makes it a versatile choice for users who work across multiple devices. The software is lightweight, requiring minimal RAM and CPU usage, which means it runs smoothly even on older hardware.- Pros:
- Free to download and use with no hidden costs
- Simple, intuitive interface ideal for beginners
- Supports full-screen, window, and custom region recording
- Records system audio, microphone, or both
- Includes basic video editor with annotations
- Exports to multiple formats: AVI, SWF, FLV, GIF, EXE
- Lightweight and efficient on system resources
- Regular updates and security patches
- Cons:
- No timeline-based editing (limits advanced video editing)
- Preview window cannot be resized during editing
- Limited advanced features compared to professional tools
- Exporting to EXE requires additional steps
- Less suitable for long-form or complex video projects